Entering & Manipulating Data:

Spreadsheet programs (such as Excel) use a tabular presentation (the ‘data sheet’) to organize, enter, and display data. Individual values, text strings, and equations are entered into cells, which are referenced according to their column and row within the table. For example, the first cell (the one in the top-left corner) is A1; that is, the cell in column A and row 1. You can enter data into cells in a number of ways. The easiest is simply to type the desired value, character, or text directly into the cell and press the Enter or return keys, which will take you to the next cell in the column. To enter the data and skip to the next cell in the same row, use the tab key instead.

Tips & links:

Note that the column is always referenced before the row

Creating a Data Series

Inserting and Formatting

Creating a Data Series:

inserting data in Excel 
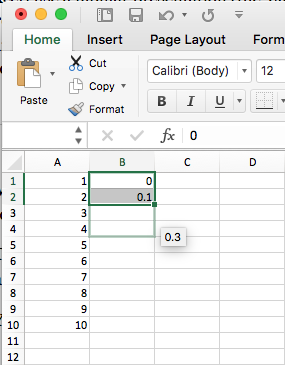
Many tasks require a sequence of numbers that increase in a regular manner. Rather than typing each number separately, Excel allows you to create such a series in a couple of ways.

To see this, open a new Excel document (worksheet), click in cell A1, type the number 1, and press the enter key. Note that this automatically moves the insertion point (the selected cell) to the next row (cell A2).

You can now click-and-drag from cell A1 down the column to cell A10 to select a range of cells in column A.

  • Select Edit→Fill→Down to fill each selected cell with the same contents as the first one.
  • Select Edit→Fill→Series... to fill the column with sequentially increasing numbers

Another way to create a series is to enter the first two values, and extend the range of selected cells. In the same worksheet, enter the values 0 and 0.1 in cells B1 and B2, then select both cells either by click-dragging across both cells. Notice how a thick border surrounds the cells with a small square on the bottom-right corner.

  • Position the cursor over the small square; the cursor should change shape when you do this
  • Click-and-drag the square down to extend the selection to cell B2; as you do this, Excel will automatically fill in the numbers using the increment between the first two cells

You should now have two columns containing the numbers 1-10 and 0-0.9.

Inserting and Formatting:

It is good practice to include labels for any values or series of values you include in a spreadsheet, so that you know what they were when you look at it again later on. You can easily do this by inserting either extra cells or an extra row at the top of the sheet.

To insert cells:
Click-drag to select cells A1 and B1, and select Insert→Cells...
To insert rows:
Click on the row number on the left side of the worksheet window, and select Insert→Rows
To insert columns:
Click on the column letter at the top of the worksheet window, and select Insert→Columns

It is also important when presenting printed versions of your spreadsheet, that the numbers be formatted to show the correct number of significant figures and decimal places. To do this, select either the entire column, entire row, or range of cells to be formatted, then choose Format→Cells... and select the appropriate format from the resulting dialog.

Continue to Formulas & Equations...

Download an Excel file for this section

Try inserting a row to contain a title in the spreadsheet; also format the numbers in column A to display 2 decimal places, and those in column B to use scientific notation